Admin Billing and Stripe Account
The Billing portal lets admins view and manage the team's subscription, review invoices, and see subscription history. Payments are processed through Stripe.
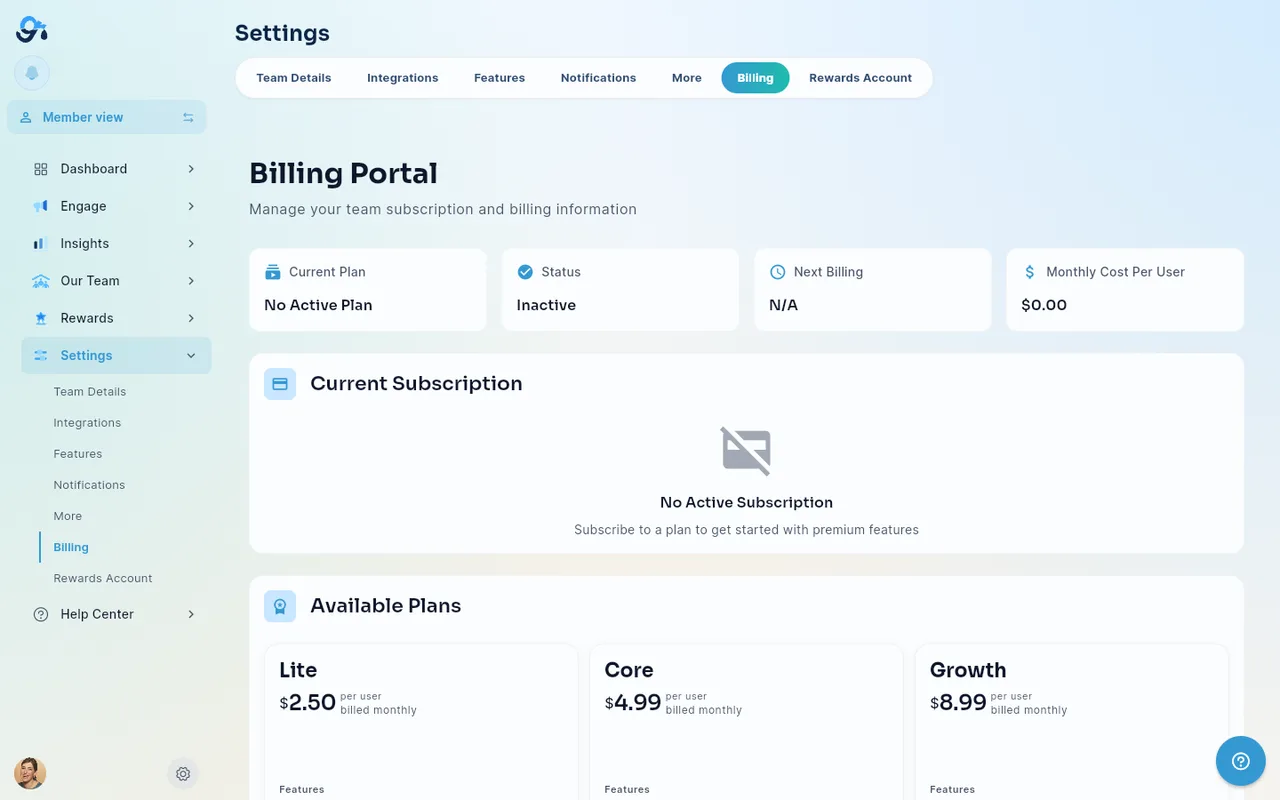
Accessing the Billing Portal
In Admin view, open Settings in the side navigation, then select the Billing sub-section (from the nested side navigation or the sticky tabs — see Admin Navigation). The Billing sub-section is the Stripe-based subscription management portal described in this article. It appears only for admins with the subscription-billing permission.
Billing Portal Overview
The Billing Portal page shows:
| Section | Description |
|---|---|
| Billing Overview Stats | High-level summary cards of your current plan usage and billing status |
| Current Subscription Card | Your active plan name, status, billing interval, and next renewal date |
| Subscription Plans | Available plans you can upgrade or downgrade to |
| Invoices | Downloadable invoice history |
| Subscription History | Record of past plan changes |
Viewing Your Current Subscription
The Current Subscription card displays:
- Plan name
- Subscription status (active, past due, cancelled, etc.)
- Billing cycle (monthly or annual)
- Next billing date
Upgrading or Changing Your Plan
- Scroll to the Subscription Plans section (or navigate directly if you arrived via the upgrade prompt — the page auto-scrolls and highlights the plans section).
- Review the available plans and their features.
- Click the Select or Upgrade button on the desired plan.
- Complete the Stripe checkout flow that opens.
- Return to the Billing Portal to confirm your new plan is active.
Viewing Invoices
The Invoices section lists all past invoices. Each entry shows:
- Invoice date
- Amount
- Status (paid, open, etc.)
Click an invoice row to download it as a PDF.
Subscription History
The Subscription History section shows a timeline of plan changes, upgrades, downgrades, and cancellations with timestamps.
Refreshing Billing Data
Pull down on the Billing Portal page (mobile) or wait for the next automatic load to refresh billing data. The page can also be refreshed by navigating away and back.
Tango API Section
The Rewards Account tab also contains a Tango API configuration section. This is used to connect your Tango Card account so members can redeem drops for gift cards and rewards through the Drop Shop.
To configure the Tango API:
- Obtain your Tango API credentials (Platform name, Customer account ID, API key) from your Tango Card account.
- Enter these credentials in the Tango API section fields.
- Save the configuration.
If you do not have a Tango account, contact Give River support for assistance setting one up.
Business Details
A Business Details dialog is available on the Rewards Account tab to update your organization's legal name, address, and tax information as it appears on invoices. Click Edit Business Details to open this dialog.
Payment Method
Payment methods are managed directly through Stripe. If you need to update your credit card on file, use the Stripe Customer Portal link that appears in the Billing Portal section.
Need Help?
For billing questions not answered here, contact Give River support or use the in-app bug/feedback reporting tool.
Did this article help?
Related articles.
See the platform in action.
30-day free trial. No credit card. River Guide included on Core and Growth.