CSV User Import
The CSV import tool lets admins add multiple members at once by uploading a spreadsheet file. The import uses a guided five-step flow with automatic column mapping, reference data verification, and a final review before any data is written.
Accessing the CSV Import
- Navigate to Our Team in the main sidebar (Member List tab).
- Click Add Members near the top of the members list.
- In the Add Members dialog, switch to the Import CSV tab.
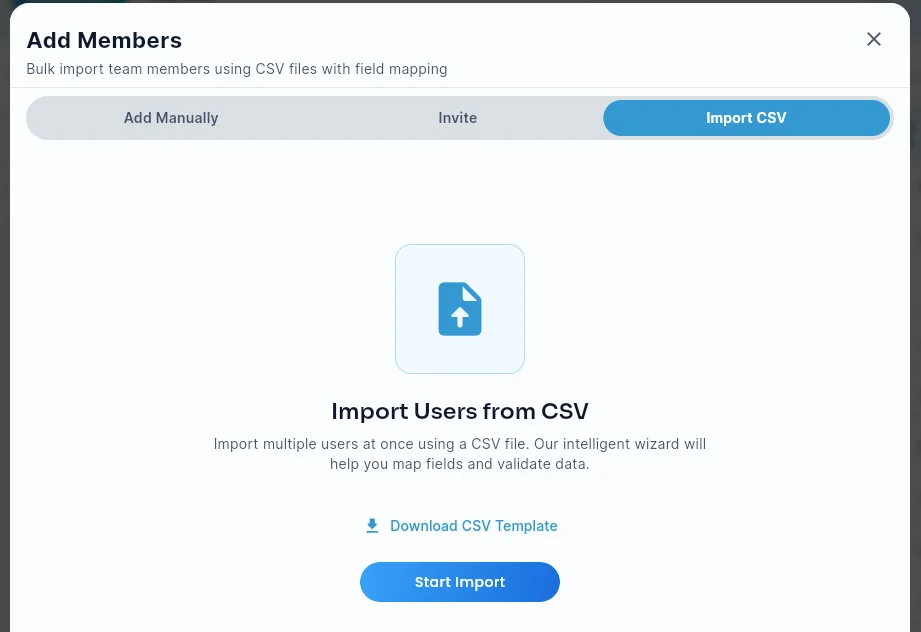
- Click Start Import to open the guided wizard.
If your CSV file doesn't already match Give River's expected columns, click Download CSV Template first for a correctly-headered starting point.
Import Flow Overview
The import consists of five steps shown in a progress indicator at the top of the dialog:
| Step | Name | What Happens |
|---|---|---|
| 1 | Upload CSV | Choose and upload your CSV file |
| 2 | Map Fields | Confirm how CSV columns map to Give River fields |
| 3 | Verify Data | Confirm departments, locations, and positions found in the CSV |
| 4 | Review Data | Preview all rows; deselect any rows you do not want to import |
| 5 | Confirm Import | Final summary and confirmation before importing |
Step 1: Upload CSV
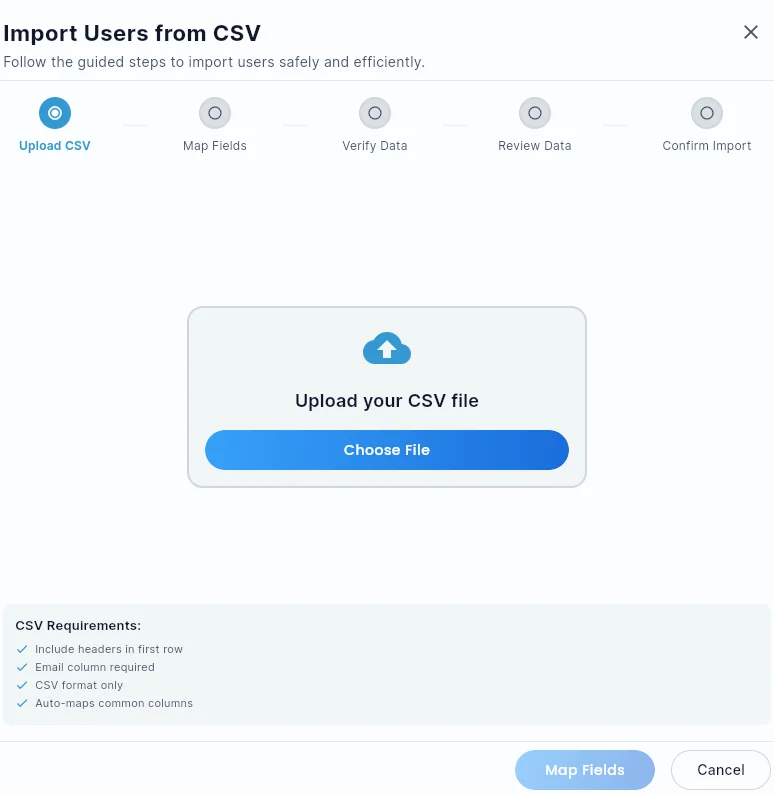
File Requirements
- File format:
.csvonly - First row must contain column headers
- Email column is required
- Common column names are auto-detected (e.g., "First Name", "Email", "Department")
Uploading
- Click Choose File in the upload area.
- Select your
.csvfile from your device. - The file is parsed immediately. If successful, the upload area shows a green checkmark.
- Click Map Fields to proceed to Step 2.
To use a different file, click Change File and select again.
Step 2: Map Fields
The platform automatically maps recognized column headers to system fields. Review each column mapping:
| Indicator | Meaning |
|---|---|
| Green chip (auto-mapped) | Column was recognized and mapped automatically |
| Blue chip (manually mapped) | You selected the mapping manually |
| Orange chip (unmapped) | Column has not been mapped — assign or ignore it |
| Gray chip (ignored) | Column will be skipped during import |
Adjusting a Mapping
- Click the dropdown on any column row.
- Select the appropriate system field (e.g., Full Name, Email, Department, Location, Position, Manager).
- Each system field can only be mapped to one column.
Ignoring a Column
- Click Ignore on any column row to exclude that column from the import. Ignored columns are skipped entirely.
- Click Include to reverse an ignore.
Required Fields
Click the info icon next to "Required Fields" to see which fields must be mapped before you can proceed. Email is always required.
Click Verify Data when all required fields are mapped.
Step 3: Verify Data
If your CSV contains department, location, or position values, this step checks them against the existing records in your Give River account.
- Matched values are confirmed automatically.
- Missing values (not yet in the system) are listed. Click Create Missing Fields to have the platform create them automatically before proceeding.
- If no reference fields (department, location, position) are mapped, this step is skipped automatically.
Step 4: Review Data
All CSV rows appear in a preview table with their mapped values. Rows are selected by default (all will be imported).
- Deselect rows by unchecking the checkbox next to any row you do not want to import.
- Validation runs automatically. Any validation errors (e.g., duplicate emails, missing required values) appear at the top of the table.
- You must resolve all errors or deselect invalid rows before proceeding.
Click Confirm to move to the final step.
Step 5: Confirm Import
A summary shows how many users will be added. Review the final table of selected users.
Click Import Users to execute the import. A loading indicator appears while the import runs. When the import completes, you'll see one of three outcomes:
- Full success — A green message confirms all users were imported. The dialog closes and the members list refreshes.
- Partial success — A summary dialog shows "N imported · M failed" along with the reason each failed row was rejected (e.g., duplicate email, invalid format, missing required field). Click Copy Failed Rows as CSV to copy just the failed rows to your clipboard with their error reasons inline. Paste them into a new CSV file, fix the issues, and re-run the import for those rows only. Successfully imported users are already added; you do not need to re-import them.
- Total failure — A red error message appears with details (e.g., backend unreachable, malformed file). Retry after addressing the issue.
Tips
- If your export from HR software uses different column names than Give River expects, use Step 2 to manually map each column.
- You can create departments, locations, and positions ahead of time (in the Members area) to avoid the Step 3 creation prompt.
- Large imports (hundreds of rows) may take a few seconds to process.
Did this article help?
Related articles.
See the platform in action.
30-day free trial. No credit card. River Guide included on Core and Growth.